Get a website
This is the basic “course.” Follow this quick tutorial and you’ll have a fully functioning basic web page and server on the domain name of your choice.
Note
- Domain name: The name of a website that you type in an address bar. This
site’s domain name is
maxwelljensen.eu. - Top-level domain (TLD): The extension of a domain name, like
.com,.net,.eu, etc. - Registrar: A service authorized to reserve a domain name for you.
Registering a domain name
When domain names first sell, they usually sell for very cheap, but once someone buys one, they have the rights to it until they decide to sell it, often for much, much more money. Therefore, it’s a good idea to reserve a domain name ASAP, even if you didn’t intend on doing anything big with it.
So let’s register your domain name!
Domains can be registered at any accredited registrar and there are a lot to choose from. Some major names are HostGator, BlueHost, NameCheap or DreamHost.
There are also sites that are more private, like Njalla and CheapPrivacy, which register a domain for you under their name, but still allow you access to it. Normally all websites must be registered with the ICANN with a real name and address, but these sites allow you to bypass that.
Choosing a registrar is not permanent, and you can transfer domains to a different registrar if you get a better deal later, so, in most cases, you can just choose one. Moving on.
About domain names
- Domain names usually require a very small yearly fee to keep registered,
usually around 12$ for most generic TLDs. There are some “specialty” TLDs that
are more expensive, but
.com,.xyz,.noand other basic TLDs are that cheap. - Once you own a domain, it is yours as long as you pay the yearly fee, but you can also sell it to someone for however much you want.
- Domain names do not hold your data or your website; instead, you add “DNS settings” that direct people connecting to your domain to your IP address. The purpose of a domain name is so that people don’t have to remember your IP address to find your website!
- Some domain names can be gotten only by fulfilling certain requirements
beyond pay. For example, to get a
.nodomain, you must be a citizen of the Kingdom of Norway.
Find a name
Most registrars offer a simple search function to look for available domain names on the Internet.
You can look for whatever domain name you want. Domains that are already bought and owned by someone else might have the option to “backorder,” but it’s always best to get one that is unowned, like these:
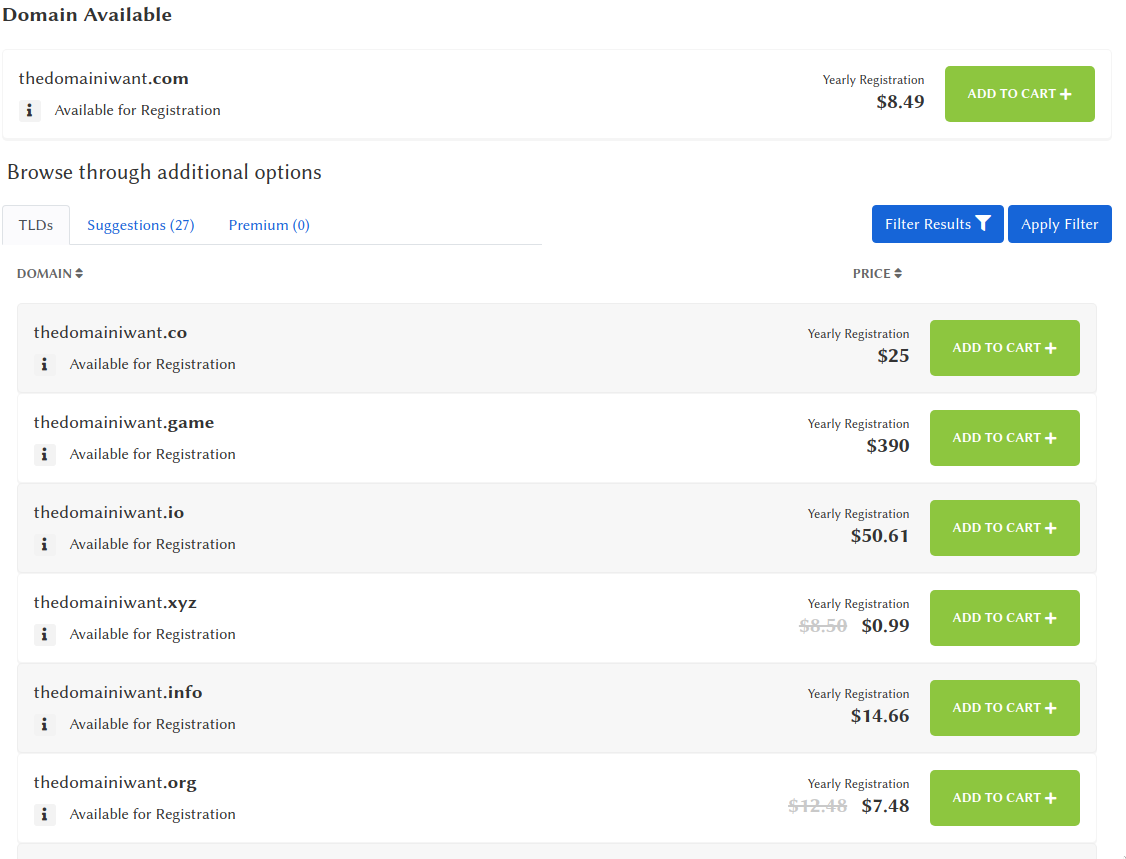
Note the differences in prices. Some unusual TLDs like .game and .io charge
a much larger fee, although you might want one. Some domains like .xyz
and .org have dramatically discounted prices, although it typically applies
for the first one or two years of subscription.
Choose the domain you want, and buy it. The process of purchasing is the same as for any other service on the Internet. That’s all you have to do to own a domain name. As you register a domain, you can also setup an automatic payment to pay your fee yearly to keep your domain. Easy.
Get a server
Once you have a domain name, you’ll need a server to host all your website files on. In general, a server is just a computer that is constanly broadcasting some services on the internet.
Servers connected to the internet can be extremely useful with or without proper websites attached to them. You can be your own website, email, file-sharing service and much more.
Alternatively you can use old hardware in your house, if you have any. A Dell Latitude from 2004 would be perfectly serviceable to host many services, including for instant messaging, conferencing, and more; let alone a website. However, we will assume you do not have surplus hardware around.
VPS
A virtual personal server (VPS) is a very cheap and easy way to get a web server, without you having to buy expensive equipment. There are a lot of online businesses that have massive server farms with great internet connection and big power bills that allow you to rent a VPS in that farm for pocket change.
A VPS usually costs 5$ a month. Sometimes slightly more, sometimes slightly less. That’s a good price for some Internet real estate, but, in truth, you can host a huge number of websites and services on a single VPS, so you get a lot more. Nothing stops you from hosting a dozen websites, an email server, a chat server and a file-sharing services on one VPS.
Starting your server in minutes
The VPS provider that we’ll be using for this guide is Vultr. Set up an account and get started. There are many VPS providers around, of course, but we will pick one mainly to illustrate how easy it is to get started. You are encouraged to find a VPS provider that is cheapest and offers best services for your particular needs.
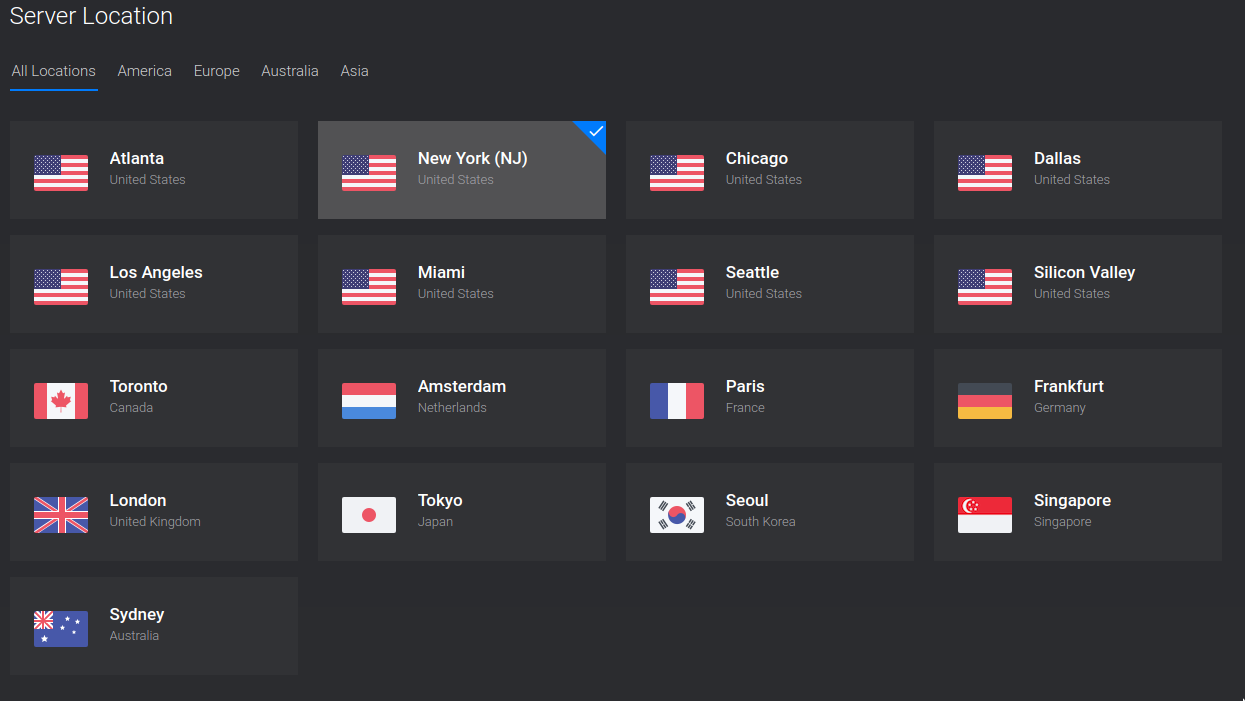
Server location
In general, it doesn’t hugely matter what physical location you have your server in. You might theoretically want it close to where you or your audience might be, but if you host a server in Australia for a European audience, they won’t have to be waiting a perceptibly longer time to load the site.
Tip
Some locations might have different abilities and plans than others. For example, in Vultr, their New York location has optional DDOS protection and also has some cheaper 3.50$ servers.
Operating system
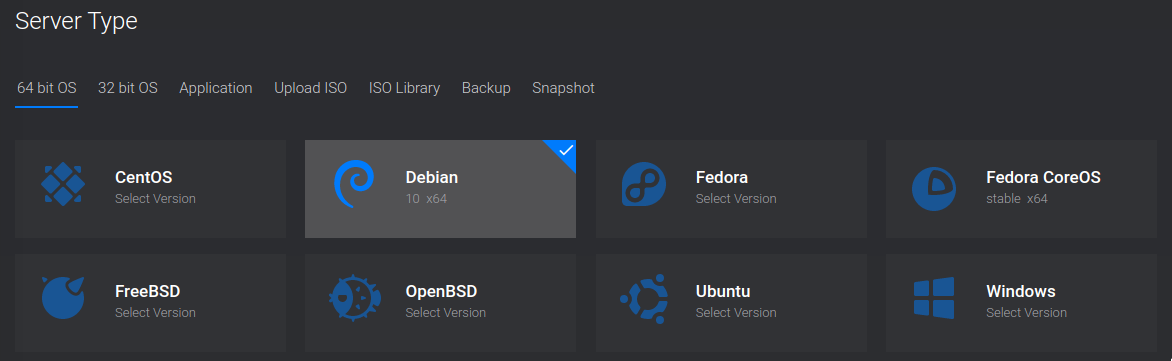
For most system administration needs, there are two Linux distributions that are the best: Debian and Fedora. We recommend Fedora as the operating system for your server. For administering a system, it is the most beginner-friendly Linux distribution. However, Debian is potentially better suited if you are planning to host sensitive data on your system, as it is a more “minimalist” system that is explicitly made for hosting servers.
Ultimately, both are valid options and setting up services for either of them follows almost identical steps.
Server size

You finally have a choice in how beefy a server you want. On Vultr, we recommend getting the cheapest option that is not IPv6 only.
Web hosting and even moderately complicated sites do not use huge amounts of RAM or CPU power. If you start doing more intensive stuff than hosting some webpages, such as a Matrix server, you can always bump up your plan on Vultr without data loss. It’s not so easy to bump down, however.
Additional features

On Vultr, there are some final checkboxes you can select additional options. You will want to check Enable IPv6 and also Block Storage Compatible.
We will be setting up IPv6, because it’s important for future-proofing your website as more of the web moves to IPv6. Block storage is the ability (if you want) to later rent large storage disks to connect to your VPS. You just might want that as an option, so it’s worth activating now.
Once you select those settings, your server will automatically be deployed. Momentarily, you will be able to see your server’s IP addresses which will be used for the next brief step.
Domain and DNS Records
Now that we have a domain and a server, we can connect the two using DNS records. DNS records, which stands for domain name system records, are usually put into your registrar and direct people looking up your website to the server where your website and other things will be.
Get your IPv4/IPv6 addresses from your VPS provider and put them into A/AAAA records on your registrar. Simple process, takes a minute, but here’s a guide with a million images just so you know.
Again, the details will vary from provider to provider, but the general principle is exactly the same at all of them. It is easy.
Open your registrar
As before, we will be using any registrar of your choice and Vultr as a server host. Go ahead and log into your accounts on both. Open up your registrar’s website, logging into their DNS record management system, and click on your domain. Then, pick a choice for “DNS records.” You’ll want to see something like this on your registrar’s site.
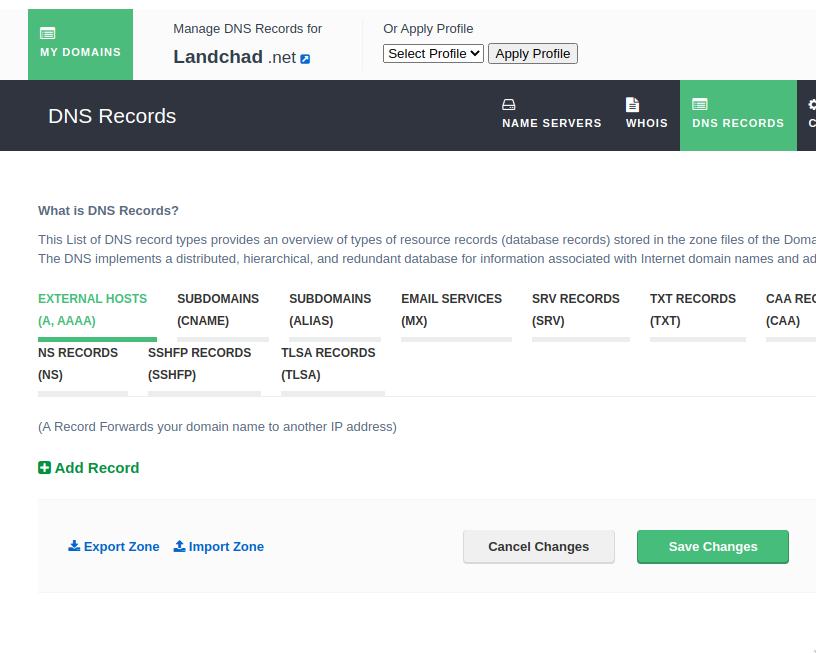
Note that we are on the “External Hosts (A, AAAA)” tab by default. There may be default settings set by your registrar. If there are, you can go ahead and delete them so they look clean like the picture above.
All we have to do now is get our IP addresses from Vultr and add new DNS records that will send connections to our server.
Keep the registrar tab open, open Vultr’s website, and we will copy-and-paste our VPS’s IP addresses in.
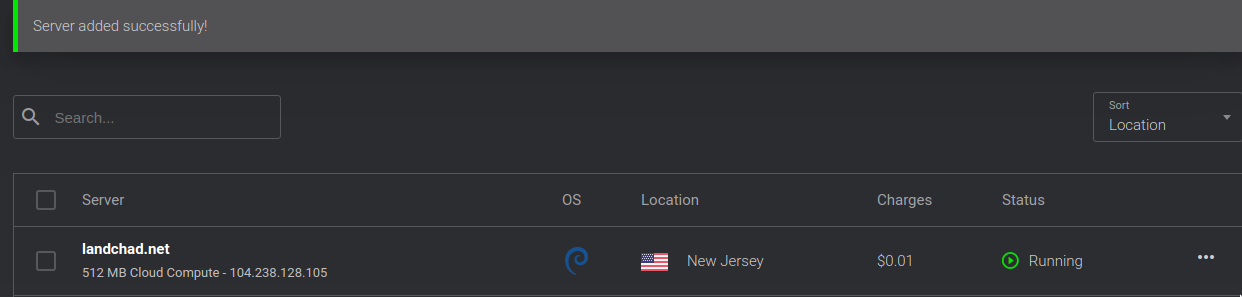
Your IP address
Looking at your server in the Vultr menu, you should see a number next to it. In the example here it is 104.238.126.105 as you can see below the server name, which we have named landchad.net after the domain we will soon attach to it. That is our IPv4 address.
Copy your IPv4 address and on your registrar’s site, click the “Add Record” record button and add two A entries pasting in your IPv4 address like we’ve done for ours here.
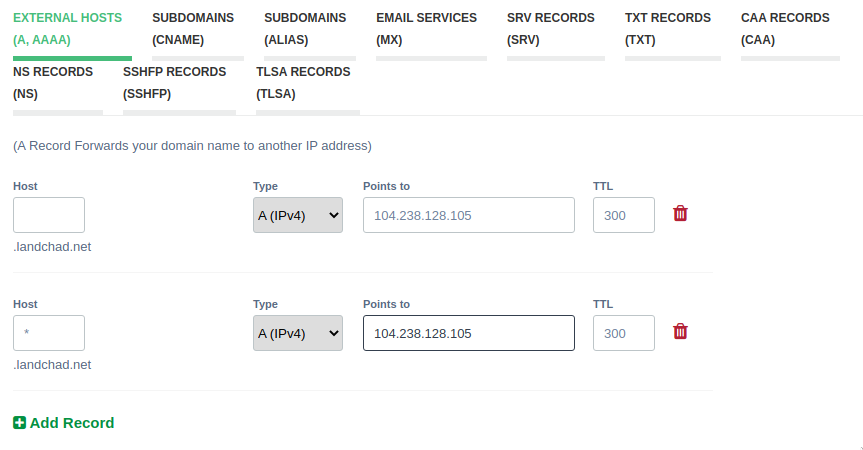
We add two entries. One has nothing written in the “Host” section. This will
direct connections to landchad.net over IPv4 to our IP address. The second
has an asterisk in the “Host” section. This will direct connections to all
possible subdomains to the right place too. For instance, mail.landchad.net,
blog.landchad.net, or any other subdomain we might want to add later.
Now let’s get our IPv6 address, which is a little more hidden for some reason. IPv6 is important because we are running out of IPv4 addresses, so it is highly important to allow connections via IPv6 as it will be standard in the future. Anyway, now back on Vultr, click on the server name.
On the server settings, click on settings and we will see we are on a submenu labeled “IPv4” where we see our IPv4 address again.

Now just click on the IPv6 submenu to reveal your IPv6 address.
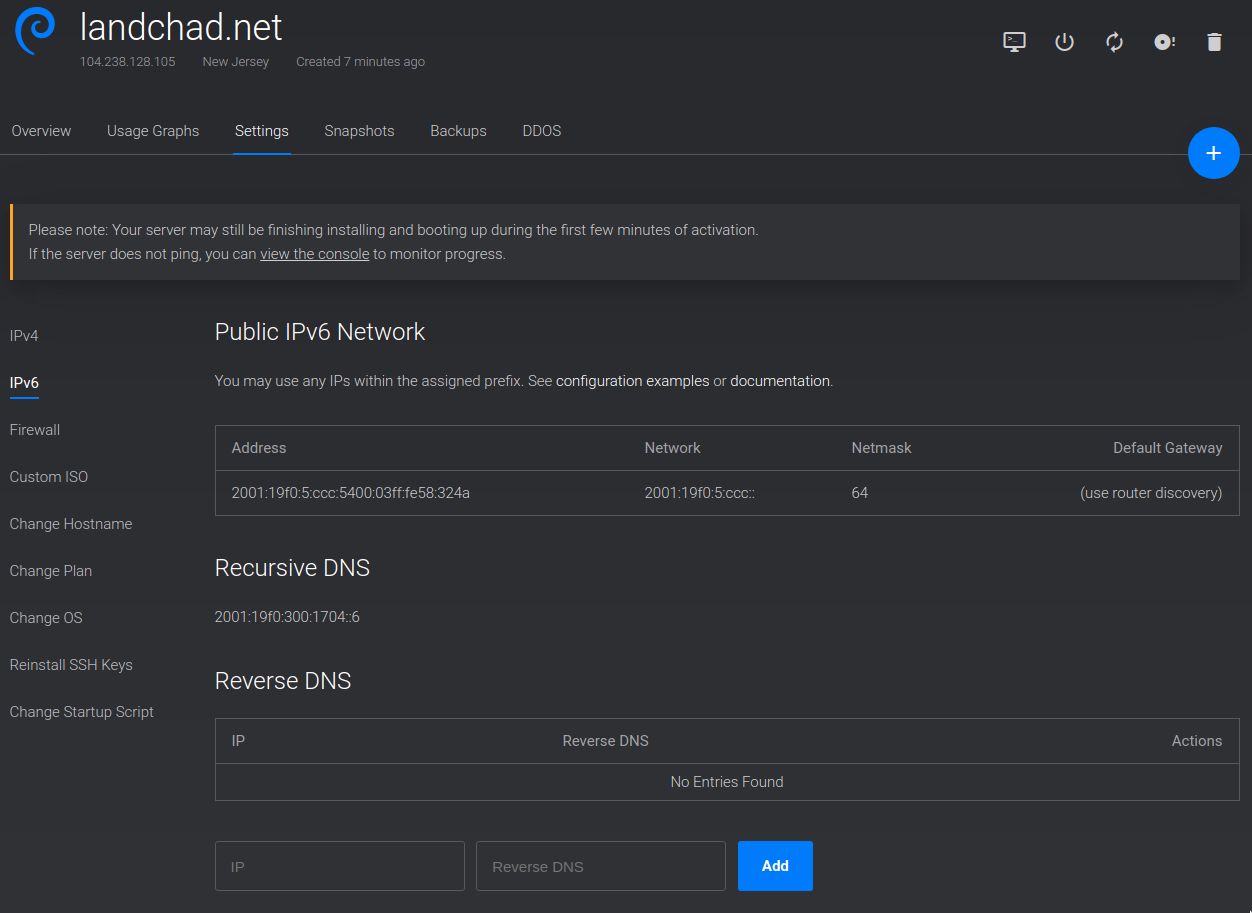
That ugly looking sequence of numbers and letters with colons in between
(2001:19f0:5:ccc:5400:03ff:fe58:324a) is our IPv6 address. Yours will look
something like it. Now let’s put it into your registrar’s site. This time, be
sure to select to put in AAAA records as below:
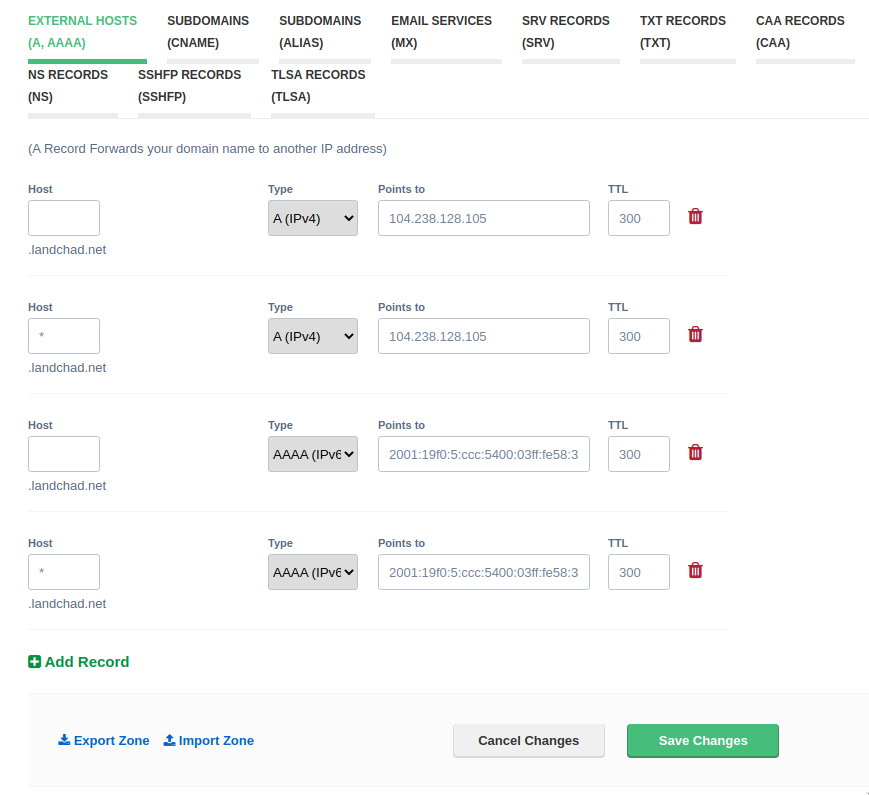
Now just click “Save Changes.” It might take a whilte for the DNS settings to propagate across the internet. It could take up to an hour, possibly longer or shorter. DNSes around the world operate quickly, but not instanteously, so be patient.
Test the connection
We can check if our domain name works by pinging our domain name, like so:
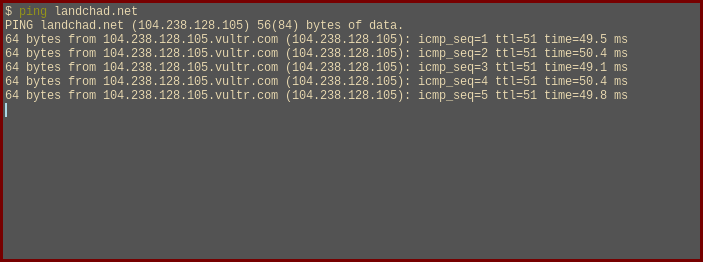
As you can see, our ping to landchad.net is now being directed to
104.238.128.105. That means we have successfully set up our DNS records! You
can also run the command host if you have it, which will list both IPv4 and
IPv6 addresses for a domain name.
The web server
At this point, we should have a domain name and a server and the domain name should direct to the IP address of the server with DNS records. We first want to log into our VPS to get a command prompt where we can set up the web server. We are assuming you are using either macOS or GNU/Linux and you know how to open a terminal. On Windows, you can also use either PuTTY or the Windows Subsystem for Linux (WSL).
We will be installing a web server known as Nginx, which is a relatively new but well-tested web server that’s very easy to operate. For our simple uses, it is the best solution.
Now, on Vultr’s site, you can click on your VPS and you will see that there is an area that shows you the password for your server at the bottom here.

Now pull up a terminal, type the following, and hit the enter key:
ssh user@example.orgIn our case, we would use root instead of user, and landchad.net instead
of example.org. Use the user name as provided by your VPS. Those are your
login credentials for an account on your system of choice.
This command will attempt to log into your server. It should prompt you for your password, and you can just copy or type in the password from Vultr’s site.
If you get an error here, you might not have done your DNS settings right. Double-check those.
Note
You can also replace the example.org with your VPS’s IP address, but you’ll
want to fix your DNS settings soon.
Installing the web server
If the program runs without an error, ssh has now logged you into your
server. Let’s start by running the following commands, depending on which
system you have set up for your VPS.
apt update &&
apt upgrade &&
apt install nginx
The first command checks for packages that can be updated and the second command installs any updates.
The third command installs nginx, the web server we’ll be using, along with
some other programs and bits.
sudo dnf update &&
sudo dnf install nginx
The first command checks for packages that can be updated and checks for any
system updates, downloading them. The second command, of course, installs
nginx as in Debian.
Configuring our Nginx
Nginx is your webserver. You can make a little website or page, put it on your VPS and then tell Nginx where it is and how to host it on the Internet. It’s simple. Let’s do it.
Nginx configuration files are in /etc/nginx/. If you are not sure what that
means, you might want to watch this three-minute
video. The two main
subdirectories in there are /etc/nginx/sites-available and
/etc/nginx/sites-enabled. The names are descriptive. The idea is that you can
make a site configuration file in sites-available and when it’s all ready,
you make a link (explained in a bit) to it in sites-enabled which will
activate it.
First, let’s create the settings for our website. You can copy and paste, with required changes, but we will also explain what the lines do.
Create a file in /etc/nginx/sites-available by doing this:
nano /etc/nginx/sites-available/mywebsiteNote that nano is a noob-friendly command line text editor. You will now be
able to create and edit this file. By saving, this file will now appear. Note
also we name the file mywebsite, but you can name it whatever you’d like.
We’re going to add the following content to the file. The content like this will be different depending on what you want to call your site.
server {
  listen 80 ;
  listen [::]:80 ;
  server_name example.org ;
  root /var/www/mysite ;
  index index.html index.htm index.nginx-debian.html ;
  location / {
    try_files $uri $uri/ =404 ;
  }
}
Explaining the configuration
-
The
listenlines tell nginx to listen for connections on both IPv4 and IPv6. -
The
server_nameis the website that we are looking for. By puttinglandchad.nethere, that means whenever someone connects to this server and is looking for that address, they will be directed to the content in this block. -
rootspecifies the directory we’re going to put our website files in. This can theoretically be wherever, but it is conventional to have them in/var/www/. Name the directory in there whatever you want. -
indexdetermine what the “default” file is; normally when you go to a website, saylandchad.net, you are actually going to a file atlandchad.net/index.html. That’s all that is. Note that that this in concert with the line above mean that/var/www/landchad/index.html, a file on our computer that we’ll create, will be the main page of our website. -
Lastly, the
locationblock is really just telling the server how to look up files, otherwise throw a 404 error. Location settings are very powerful, but this is all we need them for now.
Create the data
We’ll actually start making a “real” website later, but let’s go ahead and create a little page that will appear when someone looks up the domain.
mkdir /var/www/mysiteNow let’s create an index file inside of that directory, which will appear when the website is accessed:
nano /var/www/mysite/index.htmlWe’ll add the following basic content, but you can add whatever you want. This will appear on your website.
<!DOCTYPE html>
<h1>My website!</h1>
<p>This is my website. Thanks for stopping by!</p>
<p>Now my website is live!</p>
Once you save that file, we can enable it making a link to it in the sites-enabled directory:
ln -s /etc/nginx/sites-available/mywebsite /etc/nginx/sites-enabledNow we can just reload to make Nginx service the new website and its configuration:
systemctl reload nginxNote that if you are on Fedora, you will likely have to preface the above
command with sudo.
Firewall configuration
Vultr and some other VPSes automatically install and enable a firewall program. This will block basically everything by default, so we have to change that.
Note
There could also be no firewall. If that is the case, the following commands will not work, in which case you may simply skip this step.
Debian makes use of what is called ufw. We must open up at least ports 80 and
443 as below:
ufw allow 80
ufw allow 443
Fedora makes use of firewall-cmd. The equivalent of the Debian commands is
the following:
sudo firewall-cmd --permanent --add-service=https
sudo firewall-cmd --permanent --add-service=http
sudo firewall-cmd --reload
Port 80 is the canonical webserver port, while 443 is the port used for encrypted connections. We will certainly need that for the next steps.
As you add more services to your website, they might need you to open more ports, but that will be mentioned on individual articles. It should be noted that some local services run only for other services on your machine, so you don’t need to open ports for every process running locally, only those that directly interact with the internet, although it’s common to run those through Nginx for simplicity and security.
Our website
At this point you can now type in your website in your browser and this webpage will appear!
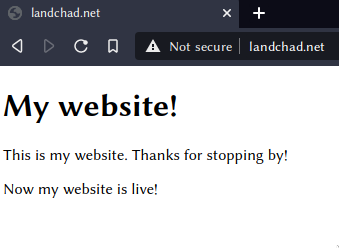
Note the “Not secure” notification. The next brief step is securing encrypted connections to your website.
Setting up HTTPS
Once you have a website, it is extremely important to enable encrypted connections over HTTPS. You might have no idea what that means, but it’s easy to do now that we’ve set our web server up.
Why bother?
-
You get the official-looking green
🔒symbol in the URL bar in most browsers which makes non-techies subtly trust your site more. Some browsers might also issue a full-screen warning altogether when your site is not encrypted. -
Some services you might set up make use of SSL certificates that you get for your domain name to encrypt their traffic, not just Nginx.
-
With HTTPS, users’ ISPs cannot snoop on what they are looking at on your website. They know that they have connected, but the particular pages they visit are private as everything is encrypted. HTTPS increases user privacy.
-
Search engines like Google favour pages with HTTPS over unencrypted HTTP.
Certbot to the rescue
Certbot is a program that automatically creates and deploys the certificates that allow encrypted connections. It used to be painful, and often expensive to do this, but now it’s all free and automatic, thanks to the Electronic Frontier Foundation and their Let’s Encrypt initiative.
This part of the guide is easy for us, since Certbot’s website has an entire interactive guide that shows you step-by-step exactly what you need to do to have your website certified. Head over there right now and follow their Nginx instructions for your system. This should take you around five minutes.
By the end of the setup, Certbot will automatically renew certificates on your system. Previously you had to set up automation for this yourself, but now Certbot truly does everything.
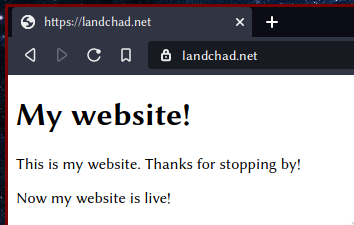
Verifying success
You should now be able to go to your website and see that there is a 🔒 or
some other notification that you are now on an encrypted connection.
Going from here
You are now a landchad, or at least the beginnings of one. Indeed, installing a website is almost as easy, if not easier, than back in 1999.
However, if you are not familiar with Linux, you just input commands from this guide without understanding much of what they do. To become a proper landchad, you must understand at least the basics of system administration of Linux and what makes it work. This is something that will take a lot longer than a single afternoon, but if you got this far through the guide then you are probably the type of person who is naturally inclined towards this in the first place. Knowing Linux will help you with setting up your server beyond Nginx, and become an even more affluent landchad.
Here are some resources to help you get started. You could do these as you go along with building up your Internet estate.
Lastly, if you are looking to simply set up a blog or another such website, take a look at the following guide: